Dealing with the Chafer Beetle – Nematode Protocol Update
Two options for addressing chafer beetle infestations
Are you or your clients having problems with the European Chafer beetle destroying lawn? We suggest the protocols described below. Please keep in mind that the insecticide must be administered by a professional with a pesticide applicator’s certificate. The rest could be done by a homeowner, but it is a procedure that is far more likely to be done by a landscaper.
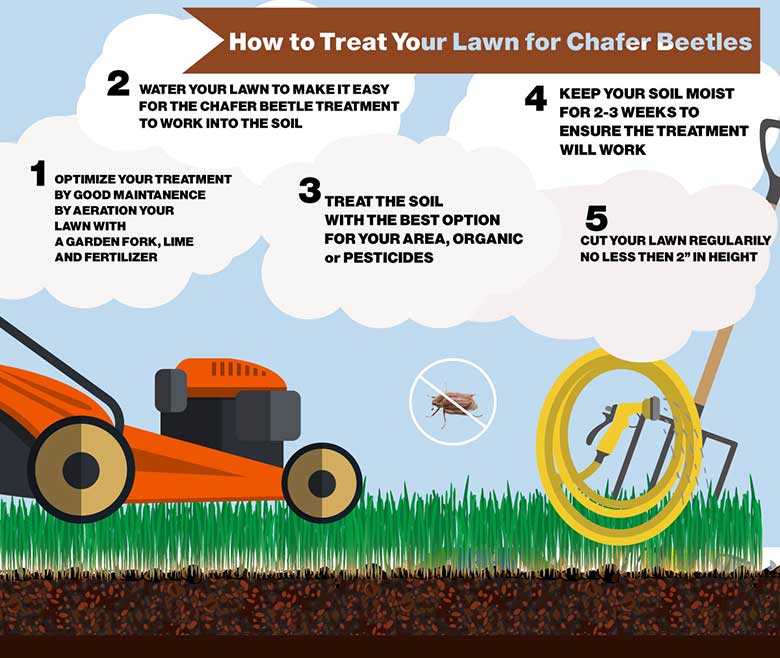
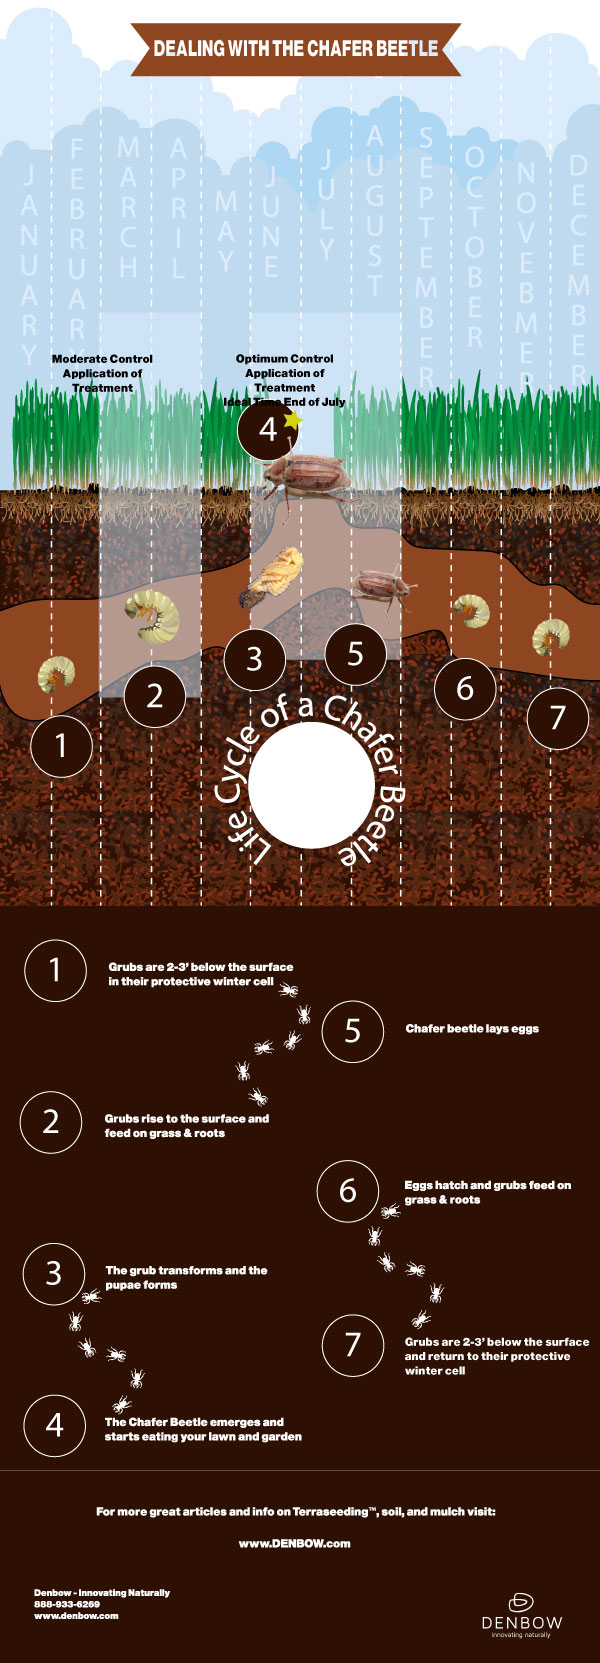
The first option is to do an Imidacloprid drench. After the drench, wait a few weeks, then remove the turf and as much soil as is reasonable—a minimum depth of 2 inches. Next, add soil to required depth; the soil can either be Terraseeded, hand seeded, or lay sod. Make sure to do this in late July/early August before applying the nematodes.
By removing the turf and some soil, you’re taking out most of the grubs, even the ones killed by the Imidacloprid. The large grubs are more difficult for the nematodes to kill. Applying nematodes after egg-hatch (in mid-late July) will target the small grubs, which is more effective. It should be emphasized that nematodes should be applied annually if the Chafer Beetle continue to be a problem in their area.
There is the issue that not all jurisdictions allow the application of this insecticide. Therefore, each customer must find out what is acceptable within their jobsite and municipality.
If insecticide use is not permitted in the area, there is a second option. First, apply the nematodes at recommended rates to the soil in April through June, and then again in September through early November; the nematodes should be applied in areas of known infestation where specific lawns show signs of chafer infestation. Remember that the lawns must remain damp for at least two weeks after nematode applications.
For both options, it is very important to follow healthy lawn practices as well established lawns are more resistant to chafer damage. These practices include aeration and topdressing, watering well at appropriate intervals, consistent fertilization, and cutting to a 2-inch height (not too short).

Remediation
In order to resist the chafer beetle when projects are newly installed, consider the following recommendations. First, if permissible, drench the soil with Imidaclorprid. Then, excavate and dispose of native topsoil to a reasonable depth of 2-6 inches. Replace the excavated material with compost-based soil; the type of soil should be based on specific requirements, i.e. turf. If applicable for the application, the use of grass species such as tall fescues and alternatives such as Microclover will help resist the beetle. Overseed the remediated areas at 3-4 times the suggested rates; in theory, this makes it difficult for the chafer to get to the surface. It will also make it harder for the chafer predators (birds, raccoons, etc.) to do damage. Lastly, encourage the use of any product or method that will increase turf establishment as well-rooted turf will stand a better chance.
Overall, it is important to remember that the European chafer beetle is an ongoing problem that is unlikely to be solved easily. There is no silver bullet. Providing quality products and installation combined with a willingness to maintain the remediated areas will improve the customers chance of a successful project.
Check out our full infographic on “How to Deal with the Chafer Beetle”. Enjoy and please share!

Here are some other resources we have found online that may be of help:
https://www.burncolandscape.com/chafer-beetles-lower-mainland/
http://www.cuttingedgevancouver.com/services/chafer-beetle-control/
http://www.landscapingvancouver.ca/chafer_beetle_vancouver.html
http://www.artknapps.ca/preventions-and-treatments-of-chafer-beetle/
http://www.coquitlam.ca/city-services/environment/european-chafer-beetle.aspx
www.coquitlam.ca/docs/default-source/city-services-documents/coquitlam—chafer-beetle-2015.pdf?sfvrsn=2
Save
Save

 Compost-based soils made with clean quality compost should be the top choice for landscape projects.


